.png)
Your Peloton bike's pedal system connects you directly to every workout. Many riders struggle with cleat setup, shoe fitting, and safe clipping techniques.
Proper pedal care and cleat maintenance can prevent injuries and improve performance. The right setup extends the life of your equipment by years.
Understanding how to properly set up cycling cleats and maintain pedal tension makes every ride smoother. Small adjustments can turn frustrating rides into confident workouts.
Most new Peloton owners feel overwhelmed by the clip-in system. Many worry about getting stuck in the pedals during intense classes.
With proper setup and basic maintenance, the pedal system becomes second nature within just a few rides. Learning the right techniques for clipping in and out of Peloton pedals eliminates the fear factor.
This guide covers everything from choosing between Look Delta and SPD systems to adjusting pedal tension. You'll learn step-by-step techniques for cleat positioning, shoe fitting, and maintaining and replacing pedals.
Key Takeaways
- Proper cleat setup and pedal tension adjustment prevents injuries and improves workout performance
- Regular maintenance of shoes, cleats, and pedals extends equipment life and ensures safe operation
- Learning correct clipping techniques builds confidence for better ride focus
Peloton Shoes, Pedals, and Cleats: What You Need to Know
Getting the right shoes and cleats for your Peloton bike makes a huge difference in your workout experience. Peloton uses Look Delta cleats with a three-bolt system.
Proper shoe selection ensures safety and performance during rides.
Cycling Shoe Compatibility and Selection
Peloton shoes must have Delta-compatible cleats that attach to the bike's pedals. Regular sneakers won't work because they lack the cleat attachment system.
The best cycling shoes for Peloton have several key features:
- Rigid soles for better power transfer
- Three-bolt cleat mounting for Delta compatibility
- Adjustable closures like Velcro straps or BOA dials
- Breathable materials for comfort during intense workouts
Riders don't have to buy official Peloton shoes. Any cycling shoe with a three-screw hole setup works perfectly fine.
Wide feet require special attention when choosing shoes. Many cyclists struggle to find comfortable options that fit properly.
Proper fit prevents hot spots and numbness during longer rides. The shoe should feel snug but not tight around the toes.
Understanding Peloton Pedals
Peloton bikes come with Look Delta-compatible pedals built into the system. These pedals use a three-point contact system that locks securely with Delta cleats.
The pedals create a stable connection between rider and bike. This connection allows for pulling up on the pedal stroke, not just pushing down.
Peloton encourages using the original pedals for the best riding experience. Changing pedals is possible but not necessary for most users.
Delta pedals have adjustable tension settings. New riders often prefer looser settings, while experienced cyclists may want tighter engagement.
The clip-in mechanism takes practice to master. Riders should practice clipping in and out before their first intense workout.
Types of Cleats: Delta, SPD, and More
Peloton uses Look Delta cleats exclusively on their standard bikes. These cleats appear as red triangles and use three bolts for attachment.
Delta Cleats:
- Three-bolt mounting system
- Large contact area for stability
- Easy to clip in and out
- Compatible with road cycling shoes
SPD Cleats:
- Two-bolt mountain bike system
- Smaller and more recessed
- Not compatible with standard Peloton pedals
- Require pedal replacement to use
Mountain bike cleats and road bike cleats offer alternatives, but they need different pedal systems. Most Peloton users stick with Delta cleats for simplicity.
The cleats attach to the shoe sole using three screws. Position affects comfort and power transfer during rides.
Cleat covers protect the cleats when walking and extend their lifespan. They prevent wear from walking on hard surfaces.
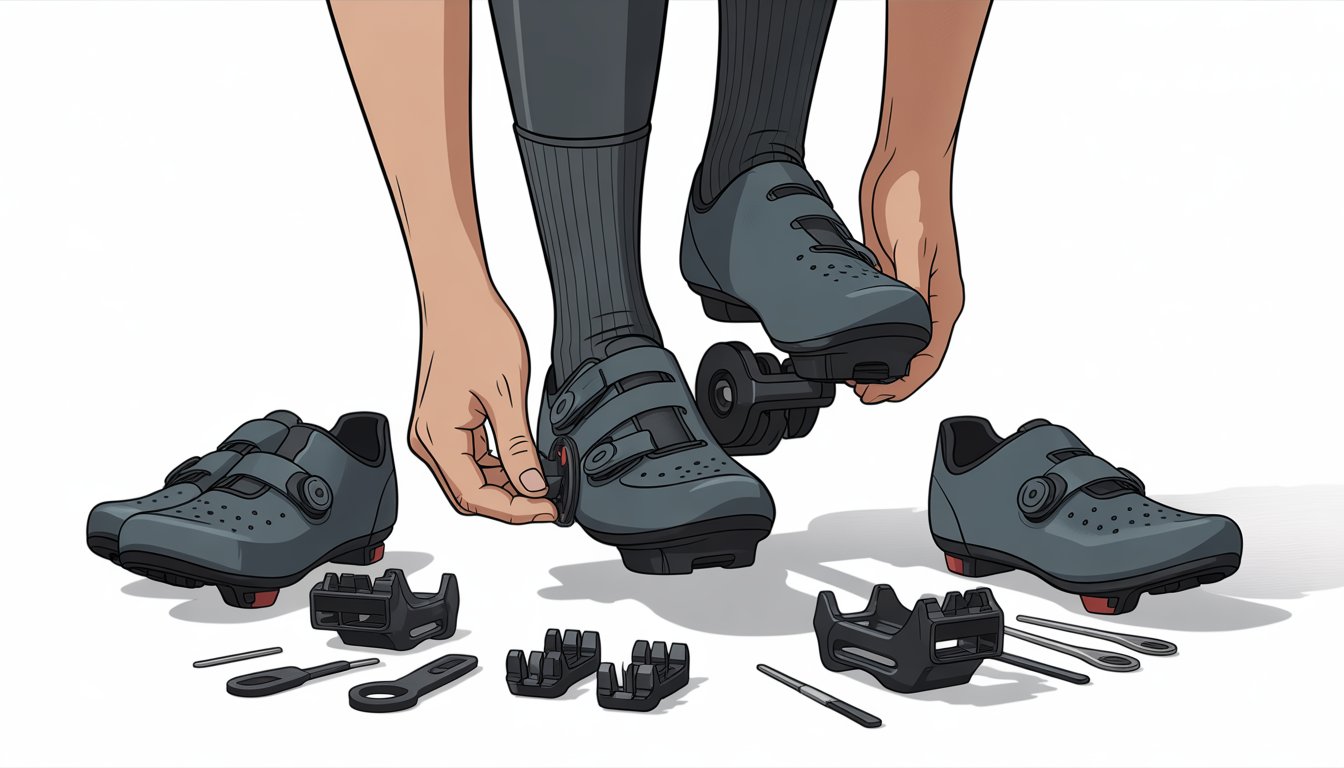
Attaching and Adjusting Cleats for Optimal Performance
Proper cleat installation requires specific tools and careful positioning. Correctly attached cleats create a secure connection between the rider's shoes and Peloton pedals.
Tools Needed for Cleat Installation
The primary tool required for Peloton cleat installation is a 4mm allen wrench. Peloton provides this tool in their Bike and Bike+ toolkit.
Additional items needed include:
- Cleats (typically included with Peloton shoes)
- Washers (provided with cleat hardware)
- Mounting screws (usually pre-packaged with cleats)
Good lighting helps ensure proper alignment during installation. A flat, stable surface provides the best workspace for accurate cleat positioning.
The allen wrench must fit snugly to prevent stripping the screw heads. Using the correct tool size ensures the cleats stay securely attached during rides.
Step-by-Step Cleat Attachment Process
To attach Peloton cleats, start by placing each cleat over the screw holes on your cycling shoes. The cleats have a specific orientation that matches the pedal design.
Installation steps:
- Position the cleat over the mounting holes
- Insert washers into the cleat hardware
- Thread screws through the washers and cleats
- Hand-tighten screws initially
- Use the 4mm allen wrench to secure firmly
Proper cleat installation requires checking that all hardware sits flush against the shoe sole. Loose cleats can cause dangerous disconnections during intense workouts.
After initial installation, test the connection by clipping into the pedals gently. The cleats should engage with a clear clicking sound.
Proper Cleat Alignment and Positioning
Cleat positioning directly affects power transfer and knee alignment during pedaling. The cleat should sit under the ball of the foot for optimal pedal engagement and comfort.
Key positioning guidelines:
- Fore-aft position: Ball of foot over pedal spindle
- Lateral position: Centered on shoe sole
- Rotational angle: Neutral foot position
For optimal placement, sit on the bike and adjust cleats while wearing your shoes. The knees should align with the toes during pedaling motion.
Small adjustments make significant differences in comfort and efficiency. Test different positions over several rides to find your ideal setup.
Proper alignment maximizes power transfer from legs to pedals while reducing stress on joints. Misaligned cleats can cause knee pain and reduce pedaling efficiency over time.
How to Put On and Secure Peloton Shoes
Proper shoe fitting involves adjusting Velcro straps and buckles for secure closure. Understanding the differences between various Peloton shoe models helps you achieve the right balance of comfort and safety.
Getting the correct fit prevents foot slippage and enhances pedaling efficiency.
Using Velcro Straps and Buckles
Most Peloton cycling shoes feature two main closure systems: Velcro straps and buckles. The Velcro straps typically cover the forefoot area and provide initial shoe security.
Loosen all straps completely before putting on the shoes. The foot slides in more easily when all closures are open.
After sliding the foot into the shoe, pull the Velcro strap across the forefoot firmly but not too tight. The strap should feel snug without causing discomfort or cutting off circulation.
Buckle systems usually sit higher on the shoe near the ankle area. These provide the primary securing mechanism for most Peloton shoes.
The buckle should click into place with a firm press. Many buckles have micro-adjustment features for fine-tuning tightness.
A properly secured buckle prevents heel lift during pedaling. The foot should feel locked in place without excessive pressure on the top of the foot.
Putting On Different Peloton Cycling Shoes
Peloton offers several shoe models with varying closure systems and fits. The standard Peloton shoes use a combination of Velcro and buckle closures.
Entry-level models typically feature simpler Velcro-only systems. These require users to adjust two or three Velcro straps across the foot for proper fit.
Higher-end Peloton bike shoes may include BOA dial systems instead of traditional buckles. The BOA system uses a dial that tightens wire cables for even pressure distribution.
When putting on BOA-equipped shoes, turn the dial clockwise to tighten and pull up to release. The system provides precise fit adjustments throughout the ride.
Women's specific models often feature narrower heel cups and different arch support. The putting-on process remains the same, but the fit characteristics differ from unisex models.
Some newer models include additional ankle straps for extra security during intense workouts.
Sets a Comfortable and Safe Fit
A proper fit prevents hot spots, numbness, and potential injury during rides. The shoes should feel snug but not painfully tight around the entire foot.
Toe clearance is critical for comfort. Aim for about a thumb's width of space between your longest toe and the shoe's front.
The heel should sit firmly in the heel cup without lifting during pedal strokes. Excessive heel movement reduces power transfer and can cause blisters.
Proper cleat alignment contributes to overall foot comfort and safety. Cleats should align with the ball of the foot for optimal power transfer.
Circulation checks help ensure the fit isn't too tight. Wiggle your toes freely inside the shoes after securing all straps.
The shoes should feel secure enough that the foot doesn't slide forward or backward during aggressive pedaling. Any movement inside the shoe reduces efficiency and increases injury risk.
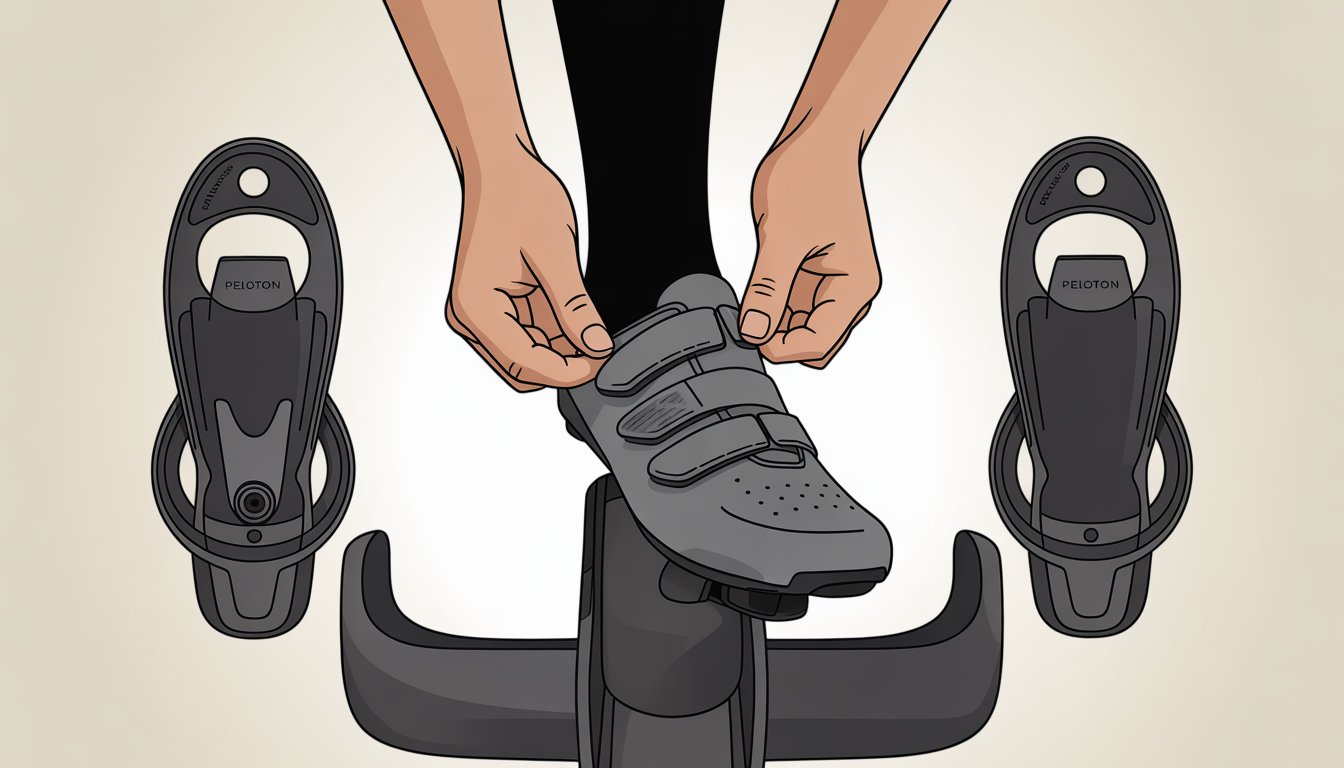
Clipping In and Out of Peloton Pedals Safely
Proper clipping technique requires aligning cleats with pedals and applying firm downward pressure until hearing a click. Unclipping involves twisting the heel outward while the pedal sits at the bottom position.
Adjusting pedal tension solves most clipping difficulties.
How to Clip In Peloton Shoes
Clipping into Peloton pedals starts with proper positioning. Stand with one foot on each side of the bike frame.
Make sure both pedals lie flat with the Peloton logo facing up. Place your foot on the pedal and align the cleat with the pedal mechanism.
Step-by-step clipping process:
- Position the ball of your foot over the center of the pedal
- Apply firm downward pressure until you hear a distinct "click"
- Test the connection by gently pulling up on your foot
The three-bolt cleat system locks securely when properly engaged. New users may need several attempts to find the correct alignment and pressure.
Peloton uses Delta-compatible Look pedals with a three-bolt system. This design provides better power transfer than flat pedals but requires practice to master.
How to Clip Out of Pedals
Unclipping is easiest with the pedal at the 6 o'clock position. Twist your heel outward while keeping your toe pointed toward the bike.
Proper unclipping technique:
- Position the pedal at the bottom of the stroke
- Keep weight off the foot being unclipped
- Twist your heel firmly away from the bike frame
- Use a quick, decisive motion
If the bike is still moving, push down the resistance knob to brake first. Attempting to unclip while pedaling can damage cleats or pedals.
The motion feels unnatural at first. Most riders need several practice sessions before unclipping becomes automatic.
Troubleshooting Clipping Issues
Pedal tension adjustment solves most clipping problems. The tension screws are on the back of each pedal with plus and minus markings.
Common issues and solutions:
- Too hard to clip out: Turn the tension screw counterclockwise toward the minus sign
- Shoes feel loose: Turn the tension screw clockwise toward the plus sign
- Can't clip in: Check cleat alignment and pedal cleanliness
If you're stuck in the pedals, grab the heel and twist away from the bike with force when off the bike. This manual method works when normal foot motion fails.
Worn cleats cause clipping difficulties. Replace cleats when the plastic shows significant wear or rounded edges.
Practice clipping in and out while holding the handlebars. This builds muscle memory before attempting during rides.
Maintenance, Safety, and Longevity Tips
Proper pedal and cleat maintenance prevents accidents and extends equipment life. Regular cleaning, timely replacements, and correct storage practices keep Peloton pedals and cleats functioning safely.
Routine Inspection and Cleaning
Check pedals weekly to ensure they remain tight and secure. Loose pedals create safety hazards and reduce performance.
Daily cleaning routine:
- Wipe down pedals after each ride
- Remove sweat and moisture from cleat mechanisms
- Use baby wipes or microfiber cloths
Monthly inspections should focus on bolt tightness and wear patterns. Check for cracks in pedal bodies or unusual grinding sounds.
Clean cleat mechanisms monthly using a soft brush to remove debris. Dirt buildup prevents smooth engagement and can damage both cleats and pedals.
Warning signs to watch for:
- Difficulty clipping in or out
- Unusual clicking or grinding noises
- Visible wear on cleat contact points
- Loose or wobbly pedal movement
Replacing Worn Cleats and Pedals
Peloton cleats typically need replacement every 6-12 months with regular use. Heavy riders or frequent users may need replacements sooner.
Cleat replacement indicators:
- Worn contact surfaces
- Difficulty engaging with pedals
- Excessive movement when clipped in
- Visible cracks or damage
Replace cleats in pairs to maintain balanced feel and performance. Mark cleat positions before removal to ensure proper alignment on new cleats.
Peloton pedals should be replaced annually as part of regular maintenance. Worn pedal mechanisms compromise safety and make clipping in difficult.
Professional installation ensures correct pedal threading and torque. Over-tightening can damage crank arms, while under-tightening creates safety risks.
Keep spare cleats available for quick replacements. This prevents riding with damaged equipment.
Storage and Shoe Care Recommendations
Store Peloton shoes in a dry, well-ventilated area away from direct sunlight. Heat and moisture damage shoe materials and accelerate cleat wear.
Proper shoe storage:
- Remove shoes immediately after workouts
- Allow complete air drying before storage
- Use shoe trees to maintain shape
- Store in breathable shoe bags or open areas
Clean shoe soles weekly to remove debris that could interfere with cleat function. Built-up dirt prevents proper pedal engagement and increases wear.
Rotate between multiple pairs of cycling shoes when possible. This allows thorough drying between uses and extends shoe life.
Check cleat bolt tightness monthly using the appropriate hex key. Loose bolts allow cleats to shift position and create unsafe riding conditions.
Apply light lubricant to cleat springs every few months. Use cycling-specific lubricants that won't attract dirt or debris.
Frequently Asked Questions
Peloton riders often need guidance on cleat attachment, pedal compatibility, and maintenance procedures. These common questions address everything from proper Delta cleat installation to alternative options for riders without cycling shoes.
How do you properly attach and detach Delta cleats to Peloton pedals?
To attach cleats to Peloton shoes, you'll need a 4mm Allen wrench. Align the cleats with the three screw holes on the bottom of the cycling shoes.
Position the cleat under the ball of your foot for optimal pedal engagement. The screws and washers secure the cleats firmly to the shoe.
To clip into the pedals, align the cleat with the pedal and press down until you hear a click. This confirms a secure connection.
To detach, twist your heel outward while keeping your toe down. The cleat releases from the pedal with a quick sideways motion.
What are the key differences between SPD and Look Delta pedal systems?
Peloton bikes come standard with Look Delta-compatible pedals. These pedals work with three-bolt cleat systems that attach to the shoe with triangle-shaped mounting points.
SPD pedals use a two-bolt cleat system with smaller, recessed cleats. SPD cleats are easier to clip in and out compared to Delta systems.
Delta cleats provide a larger contact area with the pedal. This creates better power transfer and stability during intense rides.
SPD cleats allow riders to walk more easily when off the bike. The recessed design makes the cleats less noticeable during walking.
Can Peloton bikes be used with regular non-cycling shoes, and if so, how?
Peloton bikes can accommodate regular sneakers with proper pedal modifications. Replace the standard Delta pedals with dual-sided pedals that include flat platforms.
Regular shoes work best with pedals that have toe straps or cages. These accessories help keep feet secure on the pedals.
Non-cycling shoes may slip more easily than cleated shoes. Choose shoes with good grip and avoid loose-fitting footwear.
Power transfer with regular shoes is less efficient than with cycling shoes. You may notice reduced performance during high-intensity sessions.
Are toe cages or similar accessories available for Peloton bikes for those without cycling shoes?
Standard Peloton pedals do not include toe cages or straps. Purchase aftermarket pedal systems to use regular shoes safely.
Dual-sided pedals offer both cleat compatibility and flat platforms with toe cages. These pedals allow households to share the bike regardless of shoe type.
Toe cage pedals typically cost between $50 to $150 depending on quality and features. Installation requires basic tools and mechanical knowledge.
Some riders prefer convertible pedal systems that flip between cleat-in and flat sides. These pedals provide flexibility for different users.
What type of cleats are compatible with Peloton's original pedals?
Peloton bikes use Delta-compatible cleats that work with three-bolt mounting systems. These cleats are the same type used by Look Delta and similar pedal systems.
The cleats have a triangular shape with three mounting holes. They create a secure connection that locks the shoe to the pedal during rides.
Peloton shoes come with Delta cleats included. Replacement cleats are available through Peloton or cycling equipment retailers.
Third-party Delta-compatible cleats work with Peloton pedals. Ensure any replacement cleats match the three-bolt Delta standard.
What steps should be taken to maintain and care for Peloton pedals and cleats?
Pedals need regular cleaning to remove sweat, dust, and debris. Wipe them down after each ride with a damp cloth.
Inspect your cleats regularly for wear or damage. Replace worn cleats right away to keep your ride smooth and safe.
Check the cleat mounting screws every month to make sure they're tight. Loose screws can cause cleats to shift or come off during your workout.
Apply a light, bike-specific lubricant to the pedal mechanisms every few months. This keeps your pedals moving smoothly and quietly.
Trust your investment to a master technician who knows you and your equipment. Note: Treadmill Maintenance Program coming soon!
The Concierge Maintenance Program includes:
Experience worry-free workouts with personalized service from a Certified Master Peloton Technician. Here's what you get with the program:
Thorough Inspection: David’s keen eyes and ears evaluate every inch of your bike and sound that it makes. This meticulous check ensures early detection of potential issues, preserving the bike’s lifespan and performance.
Hardware Integrity: Bolts, nuts, and screws on your Peloton bike’s screen, goose-neck, handlebars, cupholders, wheel cover, seat, inner and outer belt guards, stabilizers bars, foot pads, and nuts are inspected and tightened to precise specifications. This prevents unexpected loosening or breakages, providing a safe and sturdy workout environment.
Sensor and Resistance System Check: Ensuring these crucial components are working accurately guarantees your workout stats are reliable, and your resistance changes are smooth.
Front Hub and Axil Assembly Evaluation: This inspection safeguards the operational efficiency of your Peloton bike, ensuring smooth and fluid wheel movement.
Cadence Magnet Check: This ensures your pedaling speed is accurately tracked, enabling you to follow along with your workouts correctly.
Bottom Bracket Examination: Checking and tightening the bottom bracket to proper torque specifications ensures the bike’s structural integrity and prevents damaging wobble during intense workouts.
Touchscreen Optimization: By removing “bloat” data from the touchscreen memory, we enhance its responsiveness and speed, providing you a seamless user experience.
Belt Adjustment: A properly tightened and aligned belt ensures efficient power transfer from your pedaling to the bike’s mechanism, leading to an effective and smooth ride.
Crank Arm and Pedal Inspection: Tightening the left and right crank arms, inspecting pedals, and securing screw rivets ensures the stability of your pedal stroke, preventing potential injuries and maintaining bike longevity.
Proper Bike Calibration: This essential service ensures your bike’s resistance levels are accurate, offering you a consistent workout experience.
**Personalized Care: We’re always ready to answer any questions you may have, and are more than willing to look into any specific area of concern you may have with your Peloton equipment. Year round!
