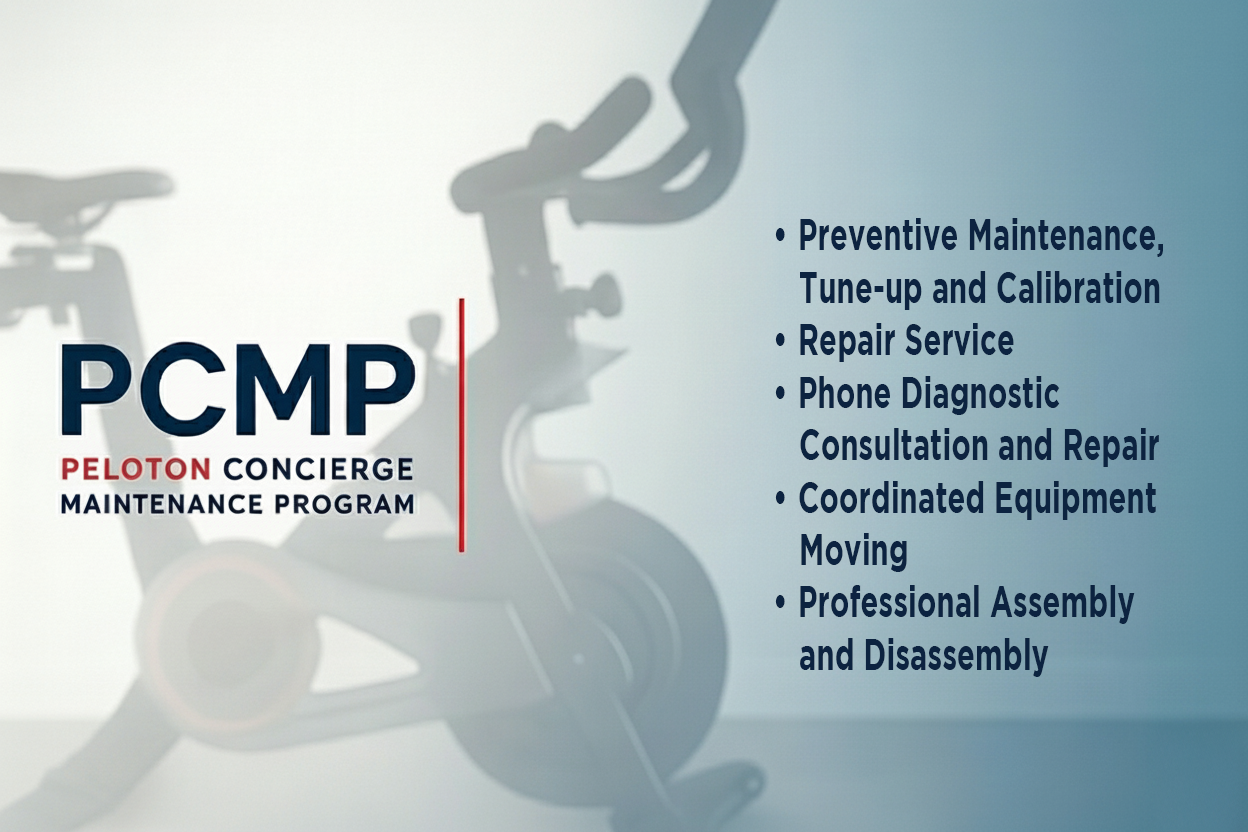
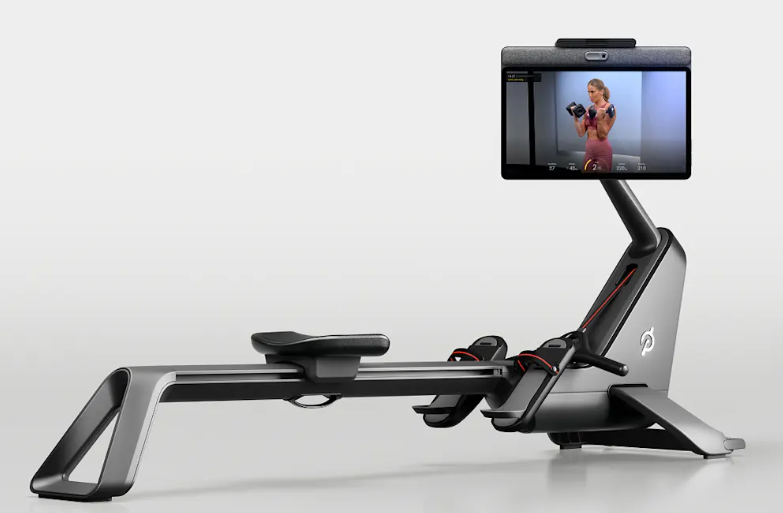
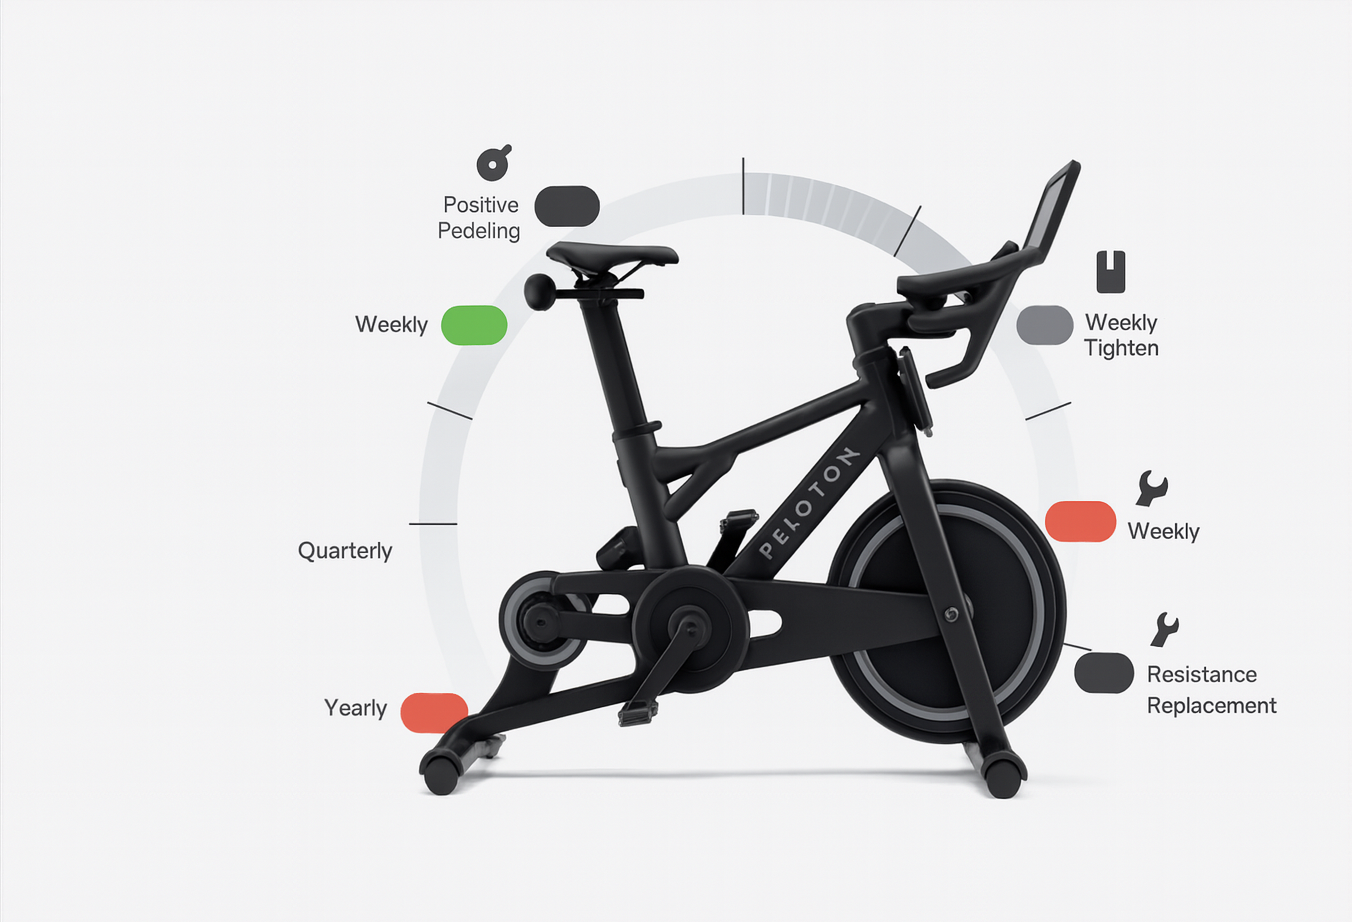
Maximize Your Spin Workouts with Smart Peloton Power Zones

You can get more output, better PRs, and less soreness from the same time on your Peloton Bike or Bike Plus by training smarter. If you ride in Michigan, Ohio, Pennsylvania, Upstate New York, or Northern Indiana, this gives you a clear plan you can fit into a busy week.

You’ll learn how to set goals that match your schedule, use cadence and resistance with purpose, and pick class types that build the right systems. We’ll work with Power Zones and smart intervals so you feel higher power at a lower RPE, with safer form and fewer aches.

You’ll also get simple fuel and recovery checklists, plus quick steps to keep your bike quiet, accurate, and ready. For routine upkeep between tune-ups, see Easy Home Care for Your Peloton Bike so your metrics stay honest and your progress stays steady.

Here’s the roadmap: set goals, dial in cadence and resistance, choose the right classes, use zones and intervals, fuel and recover well, and keep your bike running smooth. Let’s make every minute count.

Illustration: A clean, editorial-style 16:9 scene of a modern Peloton Bike+ in a warm, well-lit home gym. One rider pedals with calm focus while another checks crank bolts and wipes the frame. Soft shadows, warm lighting, neat shelves with towels and water bottles, a wall-mounted screen, and minimal clutter for a polished, magazine-ready look.

Build a results-driven plan for your Peloton rides

You want progress you can measure, not guesswork. A clear goal, the right metrics, and a weekly schedule that fits your life will move you forward without burning you out. Think simple, repeatable, and honest. Train with intent, track what matters, and adjust when your body needs it.

Set a clear goal and timeline

Pick one focus at a time. When you chase everything, you improve nothing. Three common and effective goals are:

  • Boost FTP: Raise your sustainable power for stronger rides and better PRs.
  • Lose fat: Use steady zone work and smart intervals to increase weekly calorie burn.
  • Build endurance: Extend your time in the saddle so longer rides feel easier.

Why one focus works best:

  • Your body adapts faster when stress has a single direction.
  • Your schedule stays consistent, which beats “perfect” plans you cannot maintain.
  • Progress is easier to measure, so you can course-correct quickly.

Work in focused blocks. A solid training block is 6 to 8 weeks with one light week built in. That lighter week drops volume and intensity to help you recover and lock in gains. After the block, reassess, then choose the next focus.

Use a simple goal statement so you know what you are doing and when you are done:

  • Example: Increase FTP by 5 percent in 8 weeks while riding 4 days per week.

A few quick tips:

  • Put your hardest ride after a rest day.
  • Keep the rest week simple, about 50 to 60 percent of your normal work.
  • If life gets busy, protect consistency first, then intensity.

Know your numbers: output, cadence, resistance, FTP, heart rate

Your Peloton gives you rich data, but only a few numbers drive decisions. Here is what each metric means in plain language and how to use it.

  • Output
    • What it is in plain terms: The work you are doing, shown in watts.
    • Why it matters: It tracks effort across rides and reflects fitness gains.
  • Cadence
    • What it is in plain terms: How fast you spin the pedals, measured in RPM.
    • Why it matters: Controls rhythm and how your legs feel at different efforts.
  • Resistance
    • What it is in plain terms: How hard the flywheel feels, set by the knob.
    • Why it matters: Adds load to match your zone, builds strength on the bike.
  • FTP
    • What it is in plain terms: Your best steady power for about one hour.
    • Why it matters: Sets accurate Power Zones so classes match your true fitness.
  • Heart Rate
    • What it is in plain terms: How hard your body is working, measured in BPM.
    • Why it matters: Shows strain and recovery, supports pacing and fat loss focus.

How output works: Output is a blend of cadence and resistance. Higher cadence with low resistance may feel easy but yields modest watts. Higher resistance with steady cadence gives you stronger watts. You do not need math here, just know that both knobs must work together.

What FTP means: Think of FTP as your “all-day tough” pace if the day were one hard hour. Peloton estimates this with a 20 minute test, then applies a standard factor to estimate your hour power. It is not perfect, but it is reliable enough for training zones and tracking progress.

Power Zones vs heart rate:

  • Use power when you want precision. Power changes instantly with your effort, so it is great for intervals and structured work.
  • Use heart rate when you want to manage fatigue or focus on fat loss. Heart rate lags behind power, but it shows how your body responds to stress and sleep.

Simple heart rate guide:

  • Zones 1 to 2: Easy to steady. Good for endurance, recovery, and fat loss support.
  • Zone 3: Tempo. Feels strong but controlled. Useful for longer efforts.
  • Zones 4 to 5: Hard to very hard. Keep these focused and short.

Practical tip: If your heart rate is much higher than normal at a given power, you are likely tired or under-fueled. If it is lower than normal and you feel good, you may be ready to progress.

A weekly spin schedule that fits a busy life

Structure beats motivation on a Tuesday night. Use one of these templates, then swap days to match your calendar. Keep at least one full rest day. Put the hardest ride after a rest day so you can push with fresh legs.

3 rides per week:

  • Day 1, Power Zone Intervals: Short efforts in Zones 4 to 5 with full recoveries. This is your hardest ride.
  • Day 3, Power Zone Endurance: Steady Zone 2 to low Zone 3 for 30 to 60 minutes. Build aerobic capacity.
  • Day 5, Low Impact or Recovery: Easy spin to flush the legs. Keep it conversational.

Optional strength stacking:

  • Add 2 short strength sessions on non-ride days, 15 to 25 minutes each.
  • Focus on core, hips, glutes, and upper back. Keep it simple and consistent.

4 to 5 rides per week:

  • Day 1, Power Zone Intervals: After a rest day. Hit quality work in Zones 4 to 5.
  • Day 2, Low Impact: Easy spin, 20 to 30 minutes. Keep cadence smooth and heart rate low.
  • Day 4, Power Zone Endurance: Longer steady ride in Zone 2 to low Zone 3.
  • Day 5, Tempo or Threshold: Sustained Zone 3 to low Zone 4 blocks, with short recoveries.
  • Optional Day 6, Recovery Ride: Very easy spin, 15 to 30 minutes. Only if you feel fresh.

Strength stacking for 4 to 5 rides:

  • Two strength days per week, placed away from intervals when possible.
  • If time is tight, do 10 to 15 minutes of core after an easy ride.

How to adjust on busy weeks:

  • Protect the interval day and the endurance day. Those two sessions drive most of your progress.
  • Drop the recovery ride first if you must cut time, then shorten the endurance ride.
  • Keep one full rest day. Sleep, hydration, and light mobility keep your next ride efficient.

Progress signs to watch:

  • A lower heart rate at the same Zone 2 output.
  • Higher average output on endurance rides at the same RPE.
  • Stronger interval repeats with the same recovery time.

If something feels off, scale back volume for a week and keep intensity focused. Small steps forward, repeated often, beat big swings that you cannot sustain.

Dial in bike setup and technique for more power with less pain

Small tweaks in setup and form can unlock free watts and save your knees, hips, and back. Aim for a quiet, smooth bike and a steady body. When the fit is right, your pedal stroke feels round, your hands stay light, and your breathing leads the work instead of your joints.

Illustration: A warm, editorial-style 16:9 scene of a Peloton Bike+ in a tidy home gym. One rider checks saddle height while another wipes the frame and inspects the pedals. Soft shadows, warm lighting, neat shelves with towels and bottles, a wall-mounted screen, and minimal clutter for a polished, calm look.

Fast bike fit checklist you can do in 5 minutes

You can run this quick sequence before a training block or anytime something feels off. A few millimeters can make a big difference.

  1. Seat height
    • Aim for a slight knee bend at the bottom of the stroke, about 25 to 35 degrees.
    • Your hips should stay quiet with no rocking.
    • Heel on the pedal check: with your heel on the pedal at the bottom, your leg should be straight. When you switch to the ball of your foot, you get that slight bend.
  2. Seat fore and aft
    • Sit level, place pedals at 3 o’clock and 9 o’clock.
    • Check that your forward knee lines up roughly over the pedal axle at 3 o’clock.
    • If your knee sits ahead of the axle, slide the saddle back a touch. If it sits behind, nudge forward.
  3. Handlebar height
    • Start even with or slightly above the saddle.
    • Raise the bars if your low back feels tight or your hips tuck under.
    • Lower a little, within comfort, if you want a bit more hip angle for power.
  4. Reach
    • Hands rest on the tops with soft elbows.
    • Wrists neutral, shoulders relaxed and wide, no shrugging.
    • If you feel stretched, shorten reach by raising the bars or sliding the saddle forward a few millimeters. If cramped, do the opposite.
  5. Cleat position
    • Center the cleat under the ball of your foot or slightly behind it for more stability.
    • Angle the cleat so your knees track straight during the up and down paths.
    • Tighten hardware and test clip-in. No clicking, no heel rub.

Quick quality checks:

  • Pedal a minute with eyes closed. Do both legs feel even, or does one reach?
  • Coast briefly, then resume. Your hips should return to the same stable spot.
  • A well tuned bike feels quiet and smooth, with no creaks or rubbing.

If your bike is noisy, drifts, or will not hold calibration, you may face support delays. Here is useful context on the current landscape and how to get dependable help: Challenges with Peloton support and maintenance.

Cadence, resistance, and a smooth pedal stroke

Match cadence and resistance to your goal for the day. The right pairing keeps you in the target Power Zone without frying your legs.

  • Base work lives around 80 to 95 rpm
    • This range sits well in Zone 2 to low Zone 3 for most riders.
    • It is fast enough to feel fluid, slow enough to control breathing and form.
    • Use resistance that lets you speak short phrases while holding steady watts.
  • Standing climbs use lower cadence with higher resistance
    • Think 55 to 75 rpm when you stand.
    • Add enough load so you feel pressure under the whole foot, not just the toes.
    • Keep your chest proud and hips centered over the pedals to protect your knees.

Use these simple form cues to keep power smooth and joints happy:

  • Push over the top: drive the pedal past 12 o’clock, not just down.
  • Scrape the shoe back: imagine wiping mud off at 5 to 7 o’clock.
  • Knees track straight: no knee collapse in or flare out.
  • Drive from hips and glutes: feel your backside carry the load, not your quads alone.
  • Light hands: if your hands go numb, shift weight back to your saddle and feet.

Small example for pairing:

  • Zone 2 endurance block: 85 to 90 rpm, moderate resistance, steady breathing.
  • Threshold repeats: 90 to 95 rpm seated, firm resistance, focus on even pressure.
  • Heavy hill surge: stand at 60 to 70 rpm, big resistance, 20 to 60 seconds, then recover seated.

Standing climbs vs seated work: protect knees and back

Stand with purpose, sit for the bulk of your training. Seated work builds most of your aerobic base and threshold. Standing is a tool for short surges, climbs, and variety.

When to stand:

  • Short surges to change muscle recruitment and raise heart rate.
  • Climbing segments where you want higher torque at lower cadence.
  • Brief breaks from the saddle to restore comfort during long steady blocks.

How to stand without strain:

  • Keep hips over the pedals, not pushed forward into the bars.
  • Brace your core and keep your chest lifted, eyes up.
  • Rock the bike lightly side to side from the bars, but do not yank.
  • Push down and back through the full circle, heels level or slightly down.

Common mistakes to avoid:

  • Dumping weight on the handlebars, which strains wrists and shoulders.
  • Letting knees drift inward, which stresses the patellar tendon.
  • Overreaching with hips behind the bottom bracket, which tugs the low back.

Warning signs worth addressing:

  • Knee pain, especially at the front or inside of the knee, often points to saddle height or cleat angle.
  • Hot spots in feet or numb toes can indicate too much pressure on the forefoot, tight shoes, or high cadence with not enough resistance.
  • Numb hands or tight shoulders usually mean too much weight on the bars, a long reach, or bars set too low.

Quick fixes:

  • For knee pain, recheck saddle height and fore-aft, plus cleat alignment.
  • For foot hot spots, add a touch of resistance, lower cadence slightly, or adjust cleat back 2 to 3 millimeters.
  • For hand numbness, raise bars a little, slide the saddle forward a hair, or remind yourself to keep elbows soft and grip light.

Use the rule of thirds for smart training time:

  • Spend most of your weekly minutes seated in Zones 1 to 3.
  • Use standing efforts sparingly for strength and variety.
  • Keep technique cues in your pocket every ride so power goes up while wear and tear goes down.

Train smarter: intervals and Power Zone strategies that actually work

You do not need more pain to get more power. You need the right work, at the right time, with clear targets. Use these Power Zone strategies to stack wins, avoid burnout, and keep your bike time productive.

Illustration: A clean, editorial-style 16:9 scene of a modern Peloton Bike+ in a calm home studio. One rider scrolls to start an FTP test while another finishes a cooldown, soft warm lighting, tidy shelves with towels and bottles, a wall-mounted screen, and minimal clutter for a polished, magazine-ready look.

Take an FTP test and use zones the right way

Peloton’s 20 minute FTP test estimates the power you could hold for about an hour. Warm up for 10 to 15 minutes with 3 short buildups to near threshold, 60 to 90 seconds each, with easy spinning between. During the test, start steady, settle in by minute 3, then lift in the last 5 minutes. Aim for a smooth cadence around 90 to 95 rpm. Do not sprint early. Keep breathing calm and hands light.

Use these Power Zones from your test:

  • Zone 1, Active Recovery: very easy spin to restore legs.
  • Zone 2, Endurance: easy steady pace for aerobic base.
  • Zone 3, Tempo: strong but sustainable, conversation in short phrases.
  • Zone 4, Threshold: hard, just on the edge, limited talk.
  • Zone 5, VO2 Max: very hard, short repeats only.
  • Zone 6, Anaerobic Capacity: max surges, very short.
  • Zone 7, Neuromuscular: all-out sprints, seconds only.

Build your week around 2 to 3 Power Zone rides:

  • 1 Endurance ride, 30 to 60 minutes, mostly Zone 2 with brief Zone 3.
  • 1 Tempo or Threshold ride, 20 to 45 minutes of structured blocks in Zones 3 to 4.
  • Optional VO2 work for experienced riders, 15 to 30 minutes of short Zone 5 repeats with full recovery.

Proven interval formats with sample Peloton class pairings

Pick one focus per hard day. Keep recoveries honest so the work sections stay high quality.

  • Tabata or short HIIT for peak power
    • Format: 10 to 20 seconds on, 40 to 50 seconds easy, grouped into sets.
    • Target: Zones 5 to 6 on efforts, Zone 1 between.
    • Pairings: 20 minute HIIT, 30 minute HIIT and Hills, or a 20 minute Power Zone Max class.
    • Time options: 20 minutes if tight on time, 30 minutes if fresh.
  • Threshold blocks for sustained output
    • Format: 2x10 minutes or 3x8 minutes in Zone 4 with 3 to 5 minutes easy between.
    • Target: Even cadence 90 to 95 rpm, stable breathing.
    • Pairings: 30 or 45 minute Power Zone classes with longer blocks.
    • Time options: 20 minutes as 2x6 minutes, 30 minutes as 3x8 minutes, 45 minutes as 3x10 to 12 minutes.
  • Sweet Spot for strong gains with low fatigue
    • Format: 3x10 minutes to 4x12 minutes at high Zone 3 to low Zone 4.
    • Target: Smooth pressure, relaxed shoulders, talk in short phrases.
    • Pairings: 30 or 45 minute Power Zone Endurance or Power Zone rides with steady blocks.
    • Time options: 20 minutes as 2x8 minutes, 30 minutes as 3x10 minutes, 45 minutes as 3x12 to 4x10 minutes.

Progressive overload, recovery weeks, and when to retest

Simple wins here. Change one variable at a time, and protect recovery.

  • Add minutes: Grow a 30 minute Sweet Spot session to 35, then 40, then 45.
  • Add intervals: Move from 3x8 to 3x10, then 4x8.
  • Lift average output slightly: Nudge 2 to 5 watts per block when you finish strong and breathing is controlled.

Use a lighter week every 4th week:

  • Drop volume to about 50 to 60 percent.
  • Keep one short intensity touch, then ride easy.
  • Sleep more, hydrate well, and keep mobility simple.

Retest FTP every 6 to 8 weeks, or any time your workouts feel too easy and you are repeatedly finishing blocks with extra gas. If you are in a heavy life week, wait until you feel rested before retesting.

How to pace for PR rides without blowing up

Follow the even split rule. Start at about 95 percent of your previous PR pace, hold that for the first half, then build in the last third. You will avoid the early spike and late crash.

Use these cues to stay smooth:

  • Hold a steady cadence range, usually 90 to 95 rpm seated.
  • Avoid early sprints, they burn matches you need later.
  • Lift in the last third with small resistance bumps, not wild cadence swings.

Plan your PR attempt as a short stack:

  1. Priming warm up: 10 to 15 minutes easy with 2 to 3 brief pickups to near Zone 4, 30 to 60 seconds each.
  2. PR ride: Choose 20 or 30 minutes, start at 95 percent of PR output, then lift in small steps after halfway.
  3. Cool down: 5 to 10 minutes Zone 1 to relax legs and bring heart rate down.

Pro tip: If heart rate drifts high early at your target power, back off a touch for 2 to 3 minutes, reset breathing, then resume the plan. Finishing strong beats a mid-ride fade every time.

Fuel, recover, and maintain your bike for steady gains

You can grow your power and protect your body with a simple routine that feeds your effort, restores your legs, and keeps your bike quiet and accurate. Think of it as the invisible work that turns today’s ride into tomorrow’s progress.

Illustration: A clean, editorial-style 16:9 scene of a Peloton Bike+ in a warm, well-lit home gym. One rider cools down while another checks pedal screws and wipes the frame. Soft shadows, warm lighting, tidy shelves with towels and bottles, a wall-mounted screen, and minimal clutter for a polished, magazine-ready look.

Warm-up moves to boost power and prevent injury

Start every ride with a quick primer so your cadence feels smooth and your joints feel ready. Use this 5 minute flow.

  1. 2 minutes easy spin, 85 to 95 rpm
    • Keep resistance light, breathe through your nose if possible.
    • Focus on a quiet upper body and round pedal strokes.
  2. 3 x 15 second fast legs, full recovery
    • Spin 100 to 120 rpm with very light resistance for 15 seconds.
    • Recover 45 to 60 seconds easy between efforts. Keep form crisp.
  3. 30 to 60 seconds single leg drills, off resistance
    • Unclip one foot and rest it on the frame or a stool if safe.
    • Spin with one leg for 15 to 30 seconds, switch sides.
    • Aim for a smooth circle, no choppy top or bottom.

Add two simple mobility moves off the bike to open your hips and upper back:

  • Hip hinges: Stand tall, soften your knees, hinge at the hips, then return to standing. 8 to 10 slow reps. Keep your back flat and feel your glutes engage.
  • Thoracic rotations: Half kneel, hands at chest, rotate your upper back toward the front knee, pause, then return. 6 to 8 reps each side. Move with control and breathe out on the turn.

These small pieces raise body temperature, wake up your nervous system, and reduce early-ride stiffness.

Hydration and carbs for 20, 45, and 60 minute rides

Fuel choices do not need to be complicated. Follow these simple rules to match your ride length and intensity.

Ride Fueling Guide

  • Under 30 minutes
    • During the ride: Water only if you ate in the last 2 hours
    • Why it helps: You have stored fuel, just stay hydrated
  • Around 45 minutes
    • During the ride: Water plus 200 to 300 mg sodium
    • Why it helps: Supports fluid balance and helps prevent cramping
  • 60 minutes or hard intervals
    • During the ride: 20 to 30 g carbs, 200 to 400 mg sodium
    • Why it helps: Keeps power steady and delays fatigue

Tip: Keep sips small and steady, especially if you train before breakfast.
For carbs, use whatever sits well — a sports drink, chews, a banana, or a small gel with water.

Pre-ride snack ideas, 30 to 90 minutes before:

  • Half a bagel with peanut butter and honey
  • Greek yogurt with berries and a few oats
  • Banana and a small handful of pretzels
  • Oatmeal with a drizzle of maple syrup

Post-ride recovery in the first hour:

  • Aim for 20 to 30 grams of protein and 40 to 60 grams of carbs.
  • Good options:
    • Chocolate milk and a banana
    • Turkey sandwich on whole grain
    • Protein shake with oats or a fruit smoothie
    • Eggs, rice, and salsa

Helpful cues:

  • If your heart rate runs high for a given power, you may be under-fueled or low on sleep.
  • If you feel sloshy, you likely drank too fast. Switch to smaller sips more often.

Cool down, mobility, and sleep to lock in gains

Finish strong, then finish smart. Cooldowns help clear fatigue and settle your nervous system so you bounce back faster.

  • 5 minutes easy spin
    • Stay in Zone 1, breathe slow and deep, relax your grip.
  • 5 minutes of light stretching, pain free only
    • Hips: kneeling hip flexor stretch, 30 to 45 seconds each side.
    • Hamstrings: seated reach or standing toe touch with soft knees, 30 seconds.
    • Calves: wall calf stretch, 30 seconds each side.

Sleep sets the ceiling on adaptation. Aim for 7 to 9 hours most nights. Hold one full rest day each week. If you feel stiff, try a short low impact ride, 10 to 20 minutes, to bring blood flow back without adding stress.

Signs you nailed recovery:

  • Legs feel eager early in the next ride.
  • Heart rate settles quickly after efforts.
  • Cadence feels smooth without extra thought.

Quick Peloton maintenance checklist for a quieter, smoother ride

A quiet bike makes it easier to focus on cadence and breathing. Run this simple list to protect your output and your joints.

  • Wipe sweat after every ride
    • Frame, handlebars, touchscreen edges, and adjustment points. Salt is corrosive.
  • Check pedals and cleat screws weekly
    • Tight, squeak free, and aligned so knees track straight.
  • Check seat and handlebar clamps
    • Snug, no slipping during sprints or climbs.
  • Level the bike
    • Feet flat to the floor, no wobble. Adjust leveling feet as needed.
  • Listen for new noises
    • Creaks, clicks, or rubbing point to loose hardware or alignment.
  • Recalibrate when output feels off
    • If your numbers drift from normal at the same RPE, recalibrate and retest.

If you ride hard or ride often, do not chase noises for weeks. For persistent creaks, wobble, or power drift, Contact Certified Peloton Technician: https://pcmp.net/contact. Fast diagnosis prevents bigger issues and keeps your training on schedule.

FAQs: your top spin training questions answered

You asked for straight answers that help you ride smarter today. Here is a quick, practical guide you can use to plan your week, set the right cadence and resistance, warm up for PRs, and fix common fit issues. Keep it simple, stay consistent, and let your numbers do the talking.

Illustration: A clean, editorial-style 16:9 scene of a modern Peloton Bike+ in a warm, well-lit home gym. One rider checks cadence on the screen while another adjusts the saddle. Soft shadows, warm lighting, tidy shelves with towels and bottles, and minimal clutter for a polished, calm look.

How many spin rides should I do per week to see results?

You can make steady progress with three rides, and you can move faster with four to five. Build around one hard, one moderate, and one easy ride, then add a rest day to protect recovery.

  • 3 rides per week, steady gains:
    • Hard: Intervals in Zones 4 to 5, short and focused.
    • Moderate: Zone 2 to low Zone 3 endurance.
    • Easy: Low impact recovery spin.
    • Add 1 full rest day. If possible, place the hard ride after rest.
  • 4 to 5 rides per week, faster progress:
    • Hard: Threshold or VO2 day.
    • Moderate: Endurance ride.
    • Moderate: Tempo or Sweet Spot.
    • Easy: Low impact or recovery.
    • Optional: Short technique spin if you feel fresh.
    • Keep at least 1 full rest day.

Quick check: If your easy day creeps hard, you will stall. Keep the easy ride truly easy.

What is a good cadence and resistance for beginners and intermediates?

Use cadence ranges that match the goal of the segment, then set resistance to land in the right Power Zone.

  • Base work: 80 to 95 rpm with moderate resistance
    • This supports Zone 2 to low Zone 3 for most riders.
    • Breathe steady, talk in short phrases, and keep output stable.
  • Climbs: 60 to 80 rpm with higher resistance
    • Seated or standing, feel full-foot pressure, not just toes.
    • Hold a strong core so the bike stays quiet.

Form cues to keep you efficient:

  • Keep knees tracking straight, no wobble in or out.
  • Avoid bouncing in the saddle. If you bounce, add a touch of resistance or lower cadence.
  • Sit tall, relax your grip, and keep wrists neutral.

How do I improve my Peloton output without just cranking resistance?

Pair cadence and resistance so your pedal stroke stays smooth and your power stays repeatable. Think control first, watts second.

  • Match efforts:
    • Endurance: 85 to 90 rpm, moderate resistance, steady breathing.
    • Threshold: 90 to 95 rpm, firm resistance, even pressure through the circle.
    • Climb repeats: 60 to 70 rpm, higher resistance for short blocks.
  • Stay smooth:
    • Keep pressure through the top and back of the stroke.
    • Sit stable, light hands, relaxed shoulders. Choppy form wastes power.
  • Build time in zone:
    • Add minutes to Zone 2 and Sweet Spot weekly.
    • Grow from 3x8 to 3x10 to 4x8 over a few weeks.
  • Add support work 1 to 2 days per week:
    • Short fast leg drills: 3 to 5 rounds of 15 seconds at 100 to 120 rpm, full recovery.
    • Strength for glutes and hamstrings: hip hinges, Romanian deadlifts, step-ups, bridges. Keep sets crisp, 2 to 3 sets of 6 to 10 reps.

Small steps, repeated, raise average output without frying your legs.

Should I train by heart rate or power zones?

Both tools help, they just answer different questions.

  • Power zones, pros:
    • Direct measure of effort, great for intervals and pacing.
    • Immediate feedback helps you hit targets without guesswork.
  • Power zones, cons:
    • Can mask fatigue if you chase watts on a tired day.
  • Heart rate, pros:
    • Shows internal strain and recovery.
    • Useful for managing endurance and easy days.
  • Heart rate, cons:
    • Lags behind effort and drifts over time in long rides.
    • Affected by heat, caffeine, and stress.

Best of both: Use power to set the work, use heart rate to monitor response. If heart rate runs higher than usual at a given power, you may need to ease up or fuel better.

How often should I take an FTP test on Peloton?

Retest every 6 to 8 weeks, or after a full training block. That window balances fitness gains with recovery so zones stay accurate.

  • Retest sooner if:
    • Workouts feel too easy and you finish strong with room to spare.
    • You consistently hold higher output in Zone 2 and Tempo at the same RPE.
  • Retest later if:
    • You were sick, traveled, or had a heavy life week.
    • Your sleep and fueling have been off. Wait until you feel steady.

Treat the week after a test as a mix of easy spins and one controlled hard day.

What is the best way to warm up for a PR ride?

Use a structured primer that wakes up the legs without burning matches. Aim for 8 to 12 minutes total.

  • 3 minutes easy spin
  • 3 to 4 short builds: 30 to 45 seconds each, rising to high Zone 3 or low Zone 4, full recovery between
  • 2 efforts of 30 seconds near threshold, then 2 minutes easy
  • Roll into the PR feeling warm, not tired

Keep cadence smooth around 90 to 95 rpm. Start the PR steady, then build after halfway.

How do I stop knee pain or numb hands during rides?

Fit comes first. A few millimeters can fix a lot.

  • Check these basics:
    • Seat height: slight knee bend at the bottom, hips quiet.
    • Fore and aft: at 3 o’clock, front knee tracks roughly over pedal axle.
    • Handlebar height: start level with or above the saddle for comfort.
    • Cleats: centered under the ball or slightly back, angles set so knees track straight.
  • On the bike:
    • Neutral wrists, light hands, soft elbows.
    • Keep weight on the saddle and feet, not the bars.
    • If hands go numb, raise bars a touch or slide the saddle forward slightly.

If pain persists, reduce intensity, shorten rides for a week, and consult a pro for a detailed fit or service check.

What should I eat and drink before and during a 45 minute class?

Keep it simple and easy to digest.

  • 30 to 60 minutes before:
    • A banana, or toast with peanut butter.
    • Water, about 8 to 12 ounces.
  • During:
    • Sip water throughout.
    • Add electrolytes if you sweat a lot or the room runs warm.
    • For hard sessions, take 10 to 20 grams of carbs, like a sports drink or chews.

Aim to finish the ride with steady energy, not a sugar crash. If your heart rate spikes early, you may be under-fueled.

How do I structure a week if I also run or lift?

Alternate hard days so your legs can recover. Keep heavy stress from stacking.

  • Simple structure:
    • Pair short rides with strength sessions.
    • Keep your long run or heavy lift away from the hardest bike day.
    • Use easy spins for active recovery the day after a tough run or lift.

Example:

  • Mon: Strength plus 20 minute low impact ride
  • Tue: Bike intervals
  • Wed: Rest or easy run
  • Thu: Tempo or Sweet Spot ride
  • Fri: Strength plus short technique spin
  • Sat: Long run or longer Zone 2 ride
  • Sun: Full rest

Hold at least one full rest day. Quality beats volume when life is busy.

When should I service my Peloton Bike to keep it performing like new?

Small checks weekly and a deeper tune a couple of times per year keep your bike quiet and your numbers honest.

  • Weekly quick check:
    • Wipe sweat, snug pedal and cleat screws, confirm no wobble, listen for clicks.
  • High use riders:
    • A deeper tune every 6 months keeps alignment and power accuracy tight.
  • Act fast if you notice:
    • New clicks, a loose feel, wobble, or power drift. Schedule service before it snowballs.

A quiet, accurate bike helps you focus on the work, not the noise.

Conclusion

You get faster gains when you keep things simple and consistent. Set one clear goal, build a week you can repeat, ride in the right zones, fuel and sleep well, and keep your bike quiet and accurate. Protect consistency, and your output climbs without burnout.

Pick one change to apply this week, like adding a weekly Zone 2 block, cleaning up your warm-up, or scheduling a quick maintenance check. Stick with it for 6 to 8 weeks, then retest and update your zones. For extra support, explore Peloton maintenance tips and expert advice to keep your bike and your plan on track.

If you ride in Michigan, Ohio, Pennsylvania, Upstate New York, or Northern Indiana, you value premium care and reliable performance. Keep your training sharp, your bike tuned, and your results steady. You have the plan, now put it to work this week.

Trust your investment to a master technician who knows you and your equipment. Note: Treadmill Maintenance Program coming soon!